söndag 24 februari 2019

D is for decorations


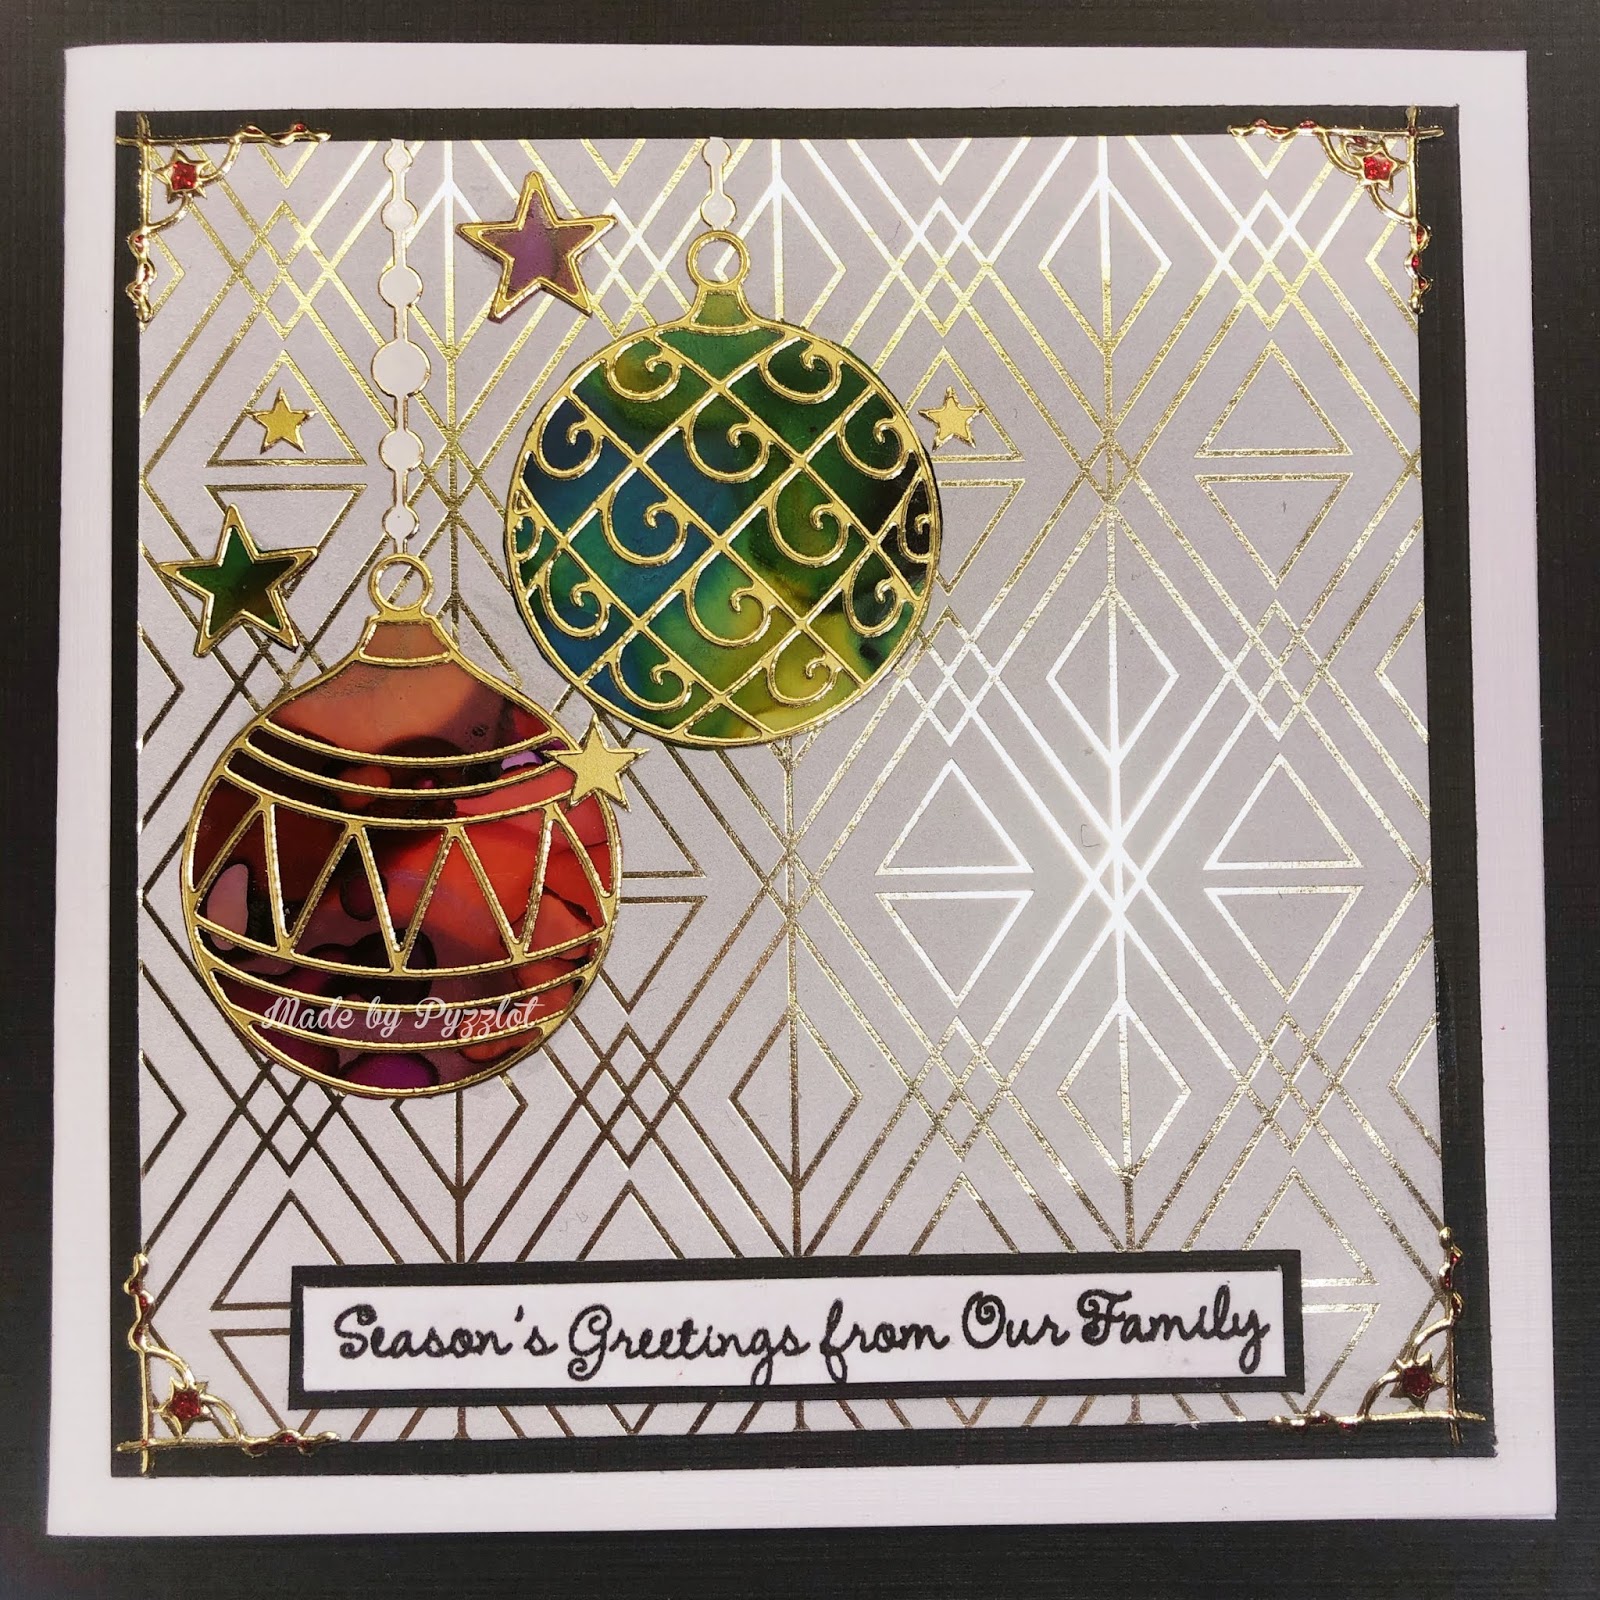
My second card in the ABC Christmas challenge for February is made for "D is for decorations". I used drop technique, alcohol inks on yupo paper.

Then I put some peel off stickers on the paper and cut out the Christmas baubles. And then some metallic spotted background paper.


This was quite a quick card! And luckily I had enough colored yupo for two cards. And then I found some  foiled paper I liked even more.


Which one is your favorite? I think I’ll enter Fab’n funky’s challenge  with this one, they’re up for a Christmas challenge too this week. 

//Pyzzlot

C is for Candy

If you participate in ABC Christmas challenge each month you’ll have fun AND a stash of cards prepared in time for next Christmas. Hence a very good idea! Here’s my card for February "C is for Candy". I cut out a  Gingerbread man from a topper and made the background using a stencil and Distress Oxides "Candide Apple", after masking in the candy cane stamp.


fredag 11 januari 2019

Distresser, stämplar och stenciler

Distressdynor (Oxides eller Inks), stämplar och stenciler. Så lyder ingredienserna i mitt favoritrecept på hur man gör ett vackert kort och njuter under processen. Varför? Jo för att hela processen börjar med ett vitt orört papper. Jag finner en enorm tjusning i det.


Idag tänkte jag använda dessa saker från Instila och berätta hur jag gör.


Jag börjar med att färglägga motivet med Distress oxides med vattenpensel enligt bilden nedan. De små detaljerna färglägger jag med akvarelpennorna när motivet är torrt.


Sedan gör jag bakgrunden med hjälp av appliceringsverktyget och stenciler. För blommorna använder jag Nuvos embellishment mousse. Den är krämig att smeta på i stencilen och ger en fin lyster.


Bakgrunden ramar jag in med cardstock i lila och vitt. Sedan fäster jag blomman med 3Dkuddar i mitten av motivet och gör samma sak med hälsningsfrasen som jag stämplar och ramar in.


Jag är själv född i februari och februaris månadssten är ametist – en lila-skiftande sten. Kanske är det därför jag tänker att det här kortet blir bra till ett februaribarn.


Hoppas du blev inspirerad och plockar upp något till dina framtida projekt! Berätta gärna för oss i så fall.


Ha en fin pysseldag!


// Pyzzlot


Materiallista:


Distress oxides


Svart vattenfast stämpeldyna


Vattenlösliga färgpennor


Stämpel set blommor


Nuvo embellishment mousse


Cardstock


Stencil triangel


Stencil blommor


Textstämpel


3D-kuddar


Appliceringsverktyg för distresser

Frozen at Valentine? Well, this will warm your heart!

Penguins and butterflies... The scrapbooking world is full of them. And I sure understand why. They are my favourite too.

The penguin stamp I used on this card is yet another old one from my deep in my stash. It is a swedish design, made by Skaparkällarn, Pernilla Nilsson. I colored with Prima water color pencils. I love how the red balloon stands out from the picture. I think this card is perfect as a Valentine card.


I made the background with Distress oxides and splashed some water drops on it with my hand and drying it off with a paper to get the speckled snowy look.

With this card I enter weekly challenge at CASology. This time themed to"Frozen".

Hope you like it and got some ideas for your next project.

//Pyzzlot

torsdag 10 januari 2019

Card made after sketch with some Penny Black friends

It was a long time ago I had my box with Penny Black stamp. Every time I do however I fall as much in love with the old favourites as with my newer ones. For this card I used stamps from to different stamp sets. The whole colouring, both background and stamp motif are made with Distress Oxides. The card is made after a sketch in AAA Cards Game #131 - Sketch + Pastel Colors. 

As soon as I saw it I knew I wanted to use the Friends-die and color the background and the letters the same and stamp some texture on the letters. After that I looked for stamps that would go well with the coloring and the friend-theme. I finished it off with the birthday wish and with adding white contours around the letters using a Posca pen.

Hope you like it!

//Pyzzlot

onsdag 9 januari 2019

B is for berries - ABC Christmas challenge

This is the second part of the January challenge for ABC Christmas and now we have come to B in the alphabet, as in B is for berries. And this is my entry:

I used the holly and the berry from a Hero arts stamp set I bought a couple of years back. The texts are from the same stamp set. It is stamped with color from Distress Oxides. I made the back with Distress ink and used the Nellies choice stencil "Swirls 2". Then I dug deep and used the very first Penny Black stamps I bought "Holly day Critters" it's called with this cute little fellow. I put them him on 3D dots to make him stand out from the background. And well I couldn't help using some Nuvo Chrystal drops to finish it off.

Hope you like it!

//Pyzzlot


A is for Anything goes

With these two cards I realise I already made 10 Christmas cards in January. Well that's kind of a good start!! A big reason for the continous production are these fun challenges. One of them monthly challenges has a alphabetic theme, two letters each month; ABC Christmas Challenge. Great idea and inspiration. Here are my card for A. B is coming up as a separate post otherwise the linking will be messy.

A is for Anything goes 
I used my new Nuvo Shimmer powder in green and Solar Flare and Green parade to create the background to imitate northern lights. Then I used the beautiful stamp from Studio Light and the textstamp from Craft Emotions. I sprinkled som Embossing powder Frantage from Stampendous over it to create a snowy feeling. I smudged the ground a bit around the animals using a white art crayon. I didn't want the line from the background to be so sharp there. I used a strip of embossed paper from the pine folder from Leane Creatief embossing folder.

The cardstock behind the picture and the thin strip on the side is actually dark green although the photo makes it look black...

Hope you enjoy it!

//Pyzzlot


Everybody loves a good story

With some stamps you can compose a story, like an illustration for a fairy tale. Lavinia is perfect for those kind of projects and maybe that is the reason why I love them so much. In this card maybe I had a little of game of thrones in my head too. ;-) It is supposed to be a card giving strength and hope to the receiver. 


I used Distress oxides to color the background and then for or five different Lavinia stamps. I participate in with this card in the Lavinia challenge #1901 "A story to be told". It's ending the 25th this month.

Hope you see the story in this card and like it!

//Pyzzlot

Recycling is the new black for everything

When I saw it I just couldn’t resist it. Fab n funky’s challenge no 421 “Recycling your Christmas cards”. It felt a bit taboo but of course I didn’t use a handmade one! But if you think about it it’s a really good idea. And I’m quite satisfied how the card turned out. 

Especially with the text stamp I never used before... though it’s been in my stash for maybe ten years. It’s from a clearstamp set bought in my favorite shop by that time. That same shop is long gone. But it is funny that I think it is the same person who sold that stamp set to me who shared the link to this particular challenge. Funny how things end up making full circle sometimes... Maybe that’s why there’s (beside the obvious need for it) a beauty in recycling.  


I used a snow globe die from Crealies, a pine tree embossing folder from Leane Creative and the bird is from a brand called Ultimate Craft. As you can see I'm quite fond of Nuvo Chrystal drops so I dotted with the bottle as snow in the globe.

Hope you got inspiration and maybe dare to recycle a card you too! It was fun!

//Pyzzlot

Go bananas with CASology

What do you do when life give you lemons. Make lemonade?? Naaahh. Go bananas instead. I love this textstamp. I think it is from Magnolia stamp. And the cute critters from Clearly Besotted goes so well with it. This time I'm participated in last week Casology Challenge - Fresh. 
I coloured the little mice with Distress Oxides. Same as I used for the background. I like the way the stencils turned out with the sour drops for the lemon and the hears for the sweet banana. 

//Pyzzlot


tisdag 8 januari 2019

Wonderful winter with the Lawn Fawn fox

Yet another little CAS-card! Big enough projects for me right now. This time I used Lawn Fawns winter fox. I love this little cute fellow. Wonder if he’s having a cup of cocoa or coffee? I Colored him up with Prima Watercolor pencils. And it’s a delight on brown cardstock. This card too is about 10x10 cm. And once again you see the pine trees from what I think is Magnolia stamps. The text is from a clear stamp set from Crafts Emotions. I used a white Posca pen for the bright white places and the dots.


 I entered Lawn Fawn’s Wonderful Winter Challenge with this card. Hope you get some inspiration from it to your own projects.

Christmas all year around - Let it snow

A crafting friend tipped me of some blogs that have Christmas challenges all year around. What a great way to avoid stressing about the cards in november/december! I actually started in January last year to making the cards and had around ten I think come december. But participating in these challenges will better that number I think. 

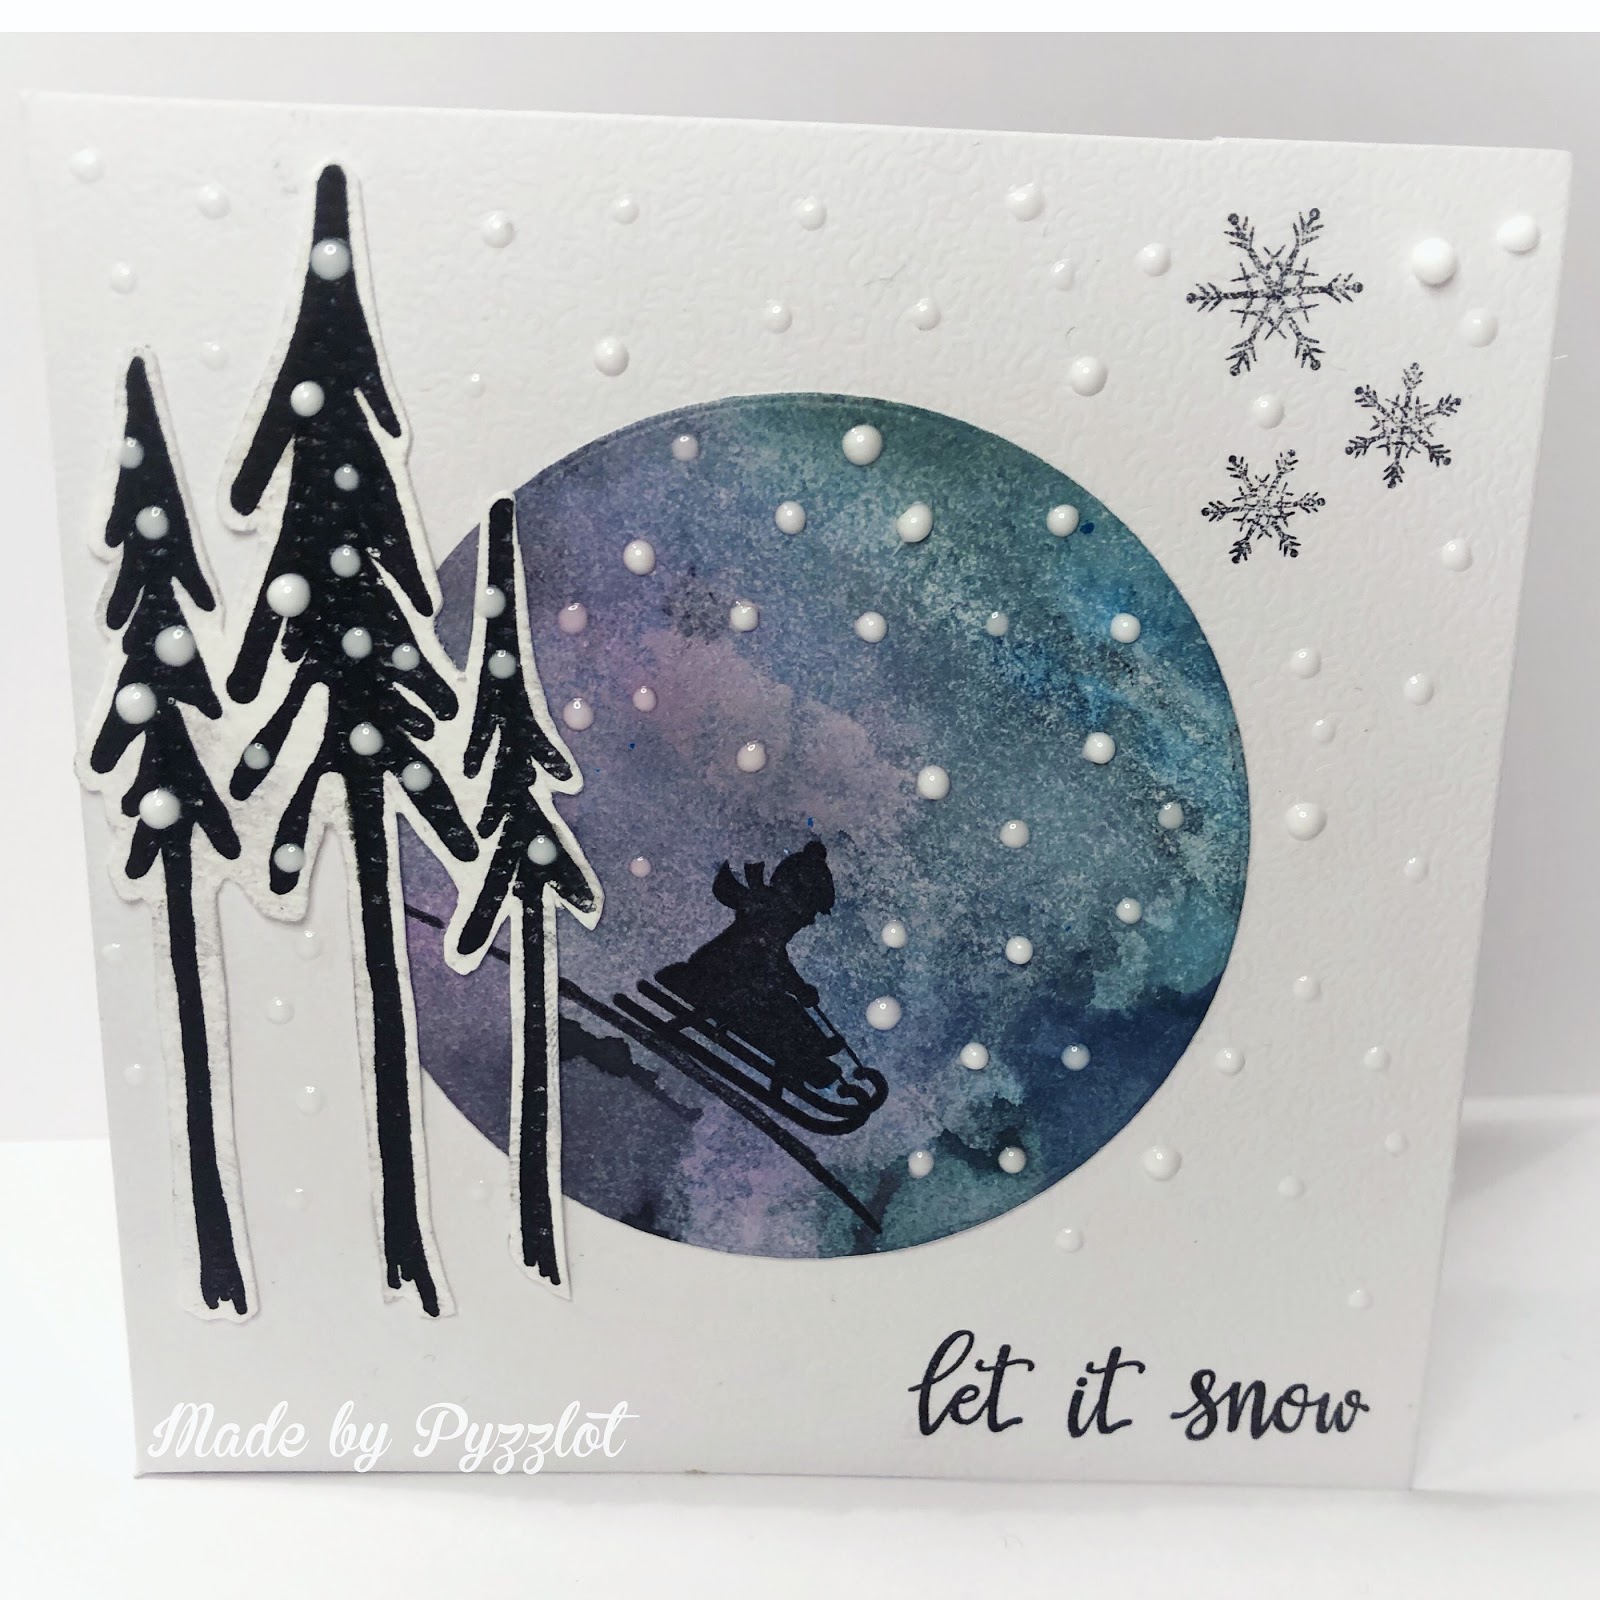
So if you think I'm crazy and greatly tired of Christmas cards - ease up this is more of a winter card anyway... In the blog  Christmas cards all year around  the January challenge theme is “Let it snow”. This is how my card turned out:


This is a quite small card, 10x10 cm. I recently started to enjoy making those. The circle is a rest product from a background I made for another project, using Distress inks. I used a Hero Arts stamp set I bought maybe a year back. The trees are some very old Magnolia stamps I think. Finally I had som Nuvo Chrystal Drops dotted over the card for snow.

Hope you like it and feels the joy of the moment illustrated... now I long for snow and taking a ride downhill with my kids. I scream more than they do of course...

//Pyzzlot

Three of a kind - CAS style

Starting the year with a terrible cold ending up with a penicillin cure. 2019 could have started better. So the only thing that keep my mood up is of course crafting. Done mostly from bed actually... So this state leaves me to styles that is more clear and simple. I actually love that style. 

Spending a lot of time in bed also means spending a lot of time with my phone and social media. That’s how I found out about these crafting challenges.

What better way to spark creativity?

First out was AAA Cards challenge - Three of something. This is how my card turned out:


I  used these three cute critters from clearly besotted. I "cut out there arms" so they could hold the hello-sign. I painted them with Prima watercolor pencils. I put the animals and the sign on 3D-glue dots to create a space between the cardstock and make them pop out a bit. Finally I used Nuvo Chrystal Drops for the white dots here and there.

Hope you enjoyed it!

//Pyzzlot

onsdag 29 mars 2017

Våren är här: live laugh love

Hej,
Det är kallt. Det har snöat. Denna vecka tvekar våren. Det är då man måste frammana den med full kraft tänker jag! Idag åt kollegorna trotsigt pinnglass på fikat. Och som ett led i detta uppmanar jag er alla: gör vårkort nu så skrämmer vi tillsammans bort de sista resterna av vinter!!

På dagens kort har jag använt många små tekniker och material så jag sammanfattar inte det steg för steg utan mer som en lista på tips vad man kan göra:

1. Använd en mixed media platta för att skapa en cool bakgrund. Mixed media plattan funkar lite som en stämpel-platta som man färgar in tex med Oxcide Distresser. Först ett lager färg sedan har jag använt en stencil för att skapa prickar. Sen trycker man pappret mot den och skapar ett avtryck. Sedan stämplade jag Lavinia motivet på. Och stämplat fjärilar och text på och stencilen igen vid sidan om.

2. Skapa höjd och struktur på en stämpel genom att använda 3Dlack och Peel-offs.
Först har jag målat den söta körsbärskvisten med distresser. Sedan lagt på 3Dlack på blommorna och sedan adderat gyllene extra-blad 

3. Lek med OH-plast eller annan genomskinlig plast.
Jag bestämde mig för att göra ett stafflikort och ville förstärka 3Dkänslan genom att kunna se igenom. Så jag stansade ett hål och fäste oh-plast för hålet och satte på fjärilar. En stor fjäril satte jag på OHplast och klippte ut och fäste högst upp på kortet.


4. Hörn med Peel-off och strukturpasta på dies
I hörnen har jag använt Peel-odds m rutmönster. Sååååå cooola! Blomhörnen är utstansade av en ram som jag klippt till . Sen har jag smetat vit strukturpasta på dem så ser de lite mera shabby chic ut.


Hoppas du fått lite idéer!

Pyzzla lugnt!// Pyzzlot Karin

Material:

söndag 12 mars 2017

Tackkort med svarta inslag

Hej, idag är det bloggdags för Instila igen och det är tackkort på schemat. Det finns ju många anledningar att göra 15 tackkort men jag fick en beställning av en god vän att göra tackkort efter hennes pappas begravning så jag tänkte visa er dem.

Jag valde att göra tre olika motiv så det skulle kännas så personligt som möjligt. 


På kort nr 1 har jag använt en liljestämpel från Nellie Snellen. Sedan har jag stämplat stämpeldynan från Distress inks på OH-plast och använt en fuktig pensel och målat motivet med. Därefter har jag maskat över motivet och sedan använt Blending tool över med samma stämpeldynor. 

Sedan har jag stämplat med en skriftstämpel från YouDos ark och avslutat med "Tack" i ena hörnet. Motivet har jag fäst på en ram av mönstrat papper och fäst på kortet som är 10x10 cm.


På kort nr 2 har jag använt den runda Blending tool för att göra en sol med dynan Fossilized amber. Och sedan färgat in resten av pappret som en solnedgång med Amber och Abandoned Coral. 

Har även färgat in ett papper i samma toner som jag skurit ut en fjäder från. Sedan har jag stämplat fåglarna och  "tack". Även detta får en ram av mönstrat papper i svart.


På kort nr 3 har jag målat en solnedgång med art crayons och dragit ut det med en våtservett. I nederkant har jag stämplat en siluett av gräs. Sedan har jag skurit ut en fjäril nederkant av horisonten. Vid sidan har jag stämplat en svärm av fjärilar. Sedan har jag skurit ut en lika stor fjäril i svart som jag embossat i en embossingfolder. Den har jag fäst mot det vita kortet så att vingarna fladdrar fritt.
Nertill har jag använt pappret från det fina svartvita blocket från Papermania.


måndag 27 februari 2017

En påskig låda att fylla med godsaker

Den här veckan när jag bloggar för Instila https://instila.se/info/inspirationssidan/ har jag altrat en chokladask. Nja jag har altrat locket. Botten (i lila) har jag faktiskt kopierat för att det skulle bli snyggast. Jag ritade av originalet och använde det som mall för att vika kopian.
Jag började med att färga in ett vitt papper med distress-ink och en mask. I mitten har jag stämplat och färglagt en Gorjuss-flicka.

Sedan skar jag även till kanter till asken och färgade in på samma sätt. Jag satte spets vid skarven.

Jag tänkte på blommor som dekoration och ville imitera vintergäck. Därför vände jag på blommorna så att avigsidan var uppåt och jag kunde forma kronbladen in mot mitten med hjälp av lite lim. Längst ner hade jag ett med rätsidan uppåt. 
Dessa och övriga dekorationer färgade jag in med Distress ink. 
Blad som jag klippt till och plattan där texten skulle vara, med mera färgade jag in helt eller delvis med gul akrylfärg. 


torsdag 16 februari 2017

Färga in med distresser, maska och embossa

Hej,
Idag tänkte jag visa hur man kan använda en färgad kortbas och vitt kartongblad och transformera det till ett kort med färg, form och struktur med några enkla steg.


1. Färga in pappret med distresser 
Jag älskar de små setten med mini-distresser och de runda Blending tool. 
2. Använd en siluett av en person och skär ut. Instila har inte just denna men flera andra som oxå skulle bli läckra att använda.
3.Använd en mask och spraya med Akrylspray över del av pappret
4. Använd en vit penna för att markera vissa av dropparna. Använd en art crayon för att färga in kanterna. 

5. Skapa struktur på siluetten genom att använda embossingfolder.
6. Färga det upphöjda med Art Crayon
7. Stämpla textstämplar på kortbasen, där hålet på siluetten hamnar och embossa i vitt.
8. Fäst ihop och dekorera med textplatta, washitejp och några små Peel-off-stjärnor
Det här är nästan ett av mina favorit sätt att jobba; att förvandla det vita pappret med hjälp av distresser. Därför är jag så glad att Instila nu har tagit in distresser i sortimentet. Just nu är jag även en sucker på textstämplar. Dessa blev jag förtjust i! Ja i det här kortet fick jag verkligen kombinera både favoritprodukter och tekniker. Skapligt kul helt enkelt!

Önskar er en inspirerad helg med mycket skapande! 
//Pyzzlot Karin

Produkter:
Siluette figur dies, exempel 1 som passar från Instila: https://instila.se/forbestallning/dies/ovriga-dies/its-a-mans-world-soccer-player-dies/
Exempel 2:https://instila.se/dies/ovriga-dies/maps-family-dies/


torsdag 2 februari 2017

Sagolika landskap med akryl och kritor

Hej,
Idag vill jag visa två mixed media kort som jag gjort. Missa inte att kolla Youtube klippet så ser ni hur kortet växer fram. https://youtu.be/nBmn6rP3yPA

Jag  har använt Nellie Snellens akrylfärger. Art spray akryl spray för mixed Media. Nellie Snellens helt perfekta lättjobbade strukturpasta. Masker, dies, stämplar, papper, peeloffs och sist men inte minst Art crayons, det motsvarar vad som brukar kallas gelatos. 


Jag trodde inte jag behövde sådana för jag har ju vattenlösliga kritor men efter att ha använt dem inser jag att det här är en produkt för sig. Den är lite mjukare än vanliga kritor. Den går att sudda ut med ett finger, fuktigt eller inte, babywipes eller såklart m pensel. Den lägger sig fint ovanpå strukturpasta. Ovanpå akryl. Den är oerhört cool att använda på en mask eftersom det blir ett tjockt härligt färgpigment på pappret. Måste ju ha många färger insåg jag och beställde fler. Oerhört kul att jobba med!
Jag har använt kritan för att skapa himlen. Jag har även färgat in stämpeln med krita och sprayat på med vatten. Och stämplat på himlen för fint mönster. 
Ovanpå strukturpastan. Och färgat in med fuktigt finger. 


Så här blev korten:


Kika in på Instilas inspirationsblogg för mer inspiration: https://instila.se/info/inspirationssidan/